January 18, 2011

I've Moved!

Friendly reminder: I've moved! I will no longer be blogging at this address. Instead you can find me here:


Thanks!

January 17, 2011

Get Ready!

I have some super exciting news to share! 

I have truly enjoyed sharing delectable recipes here on Ice Cream & Wine over the past year. I've been deeply inspired to try new foods, share healthy recipes and of course indulge in sweet treats. Because of the recent changes in my life - hello, California! - I've decided that I have more to share than just recipes.

Enter: my new blog!


The Granola Chronicles will still feature simple recipes but will also include my adventures in California, random thoughts on leading a healthy and active life and anything else that crosses my mind. Please know that I'm still finishing the design of the blog - but check out the "About" page to learn about the blog's name. I think it's rather fun!

If you're currently a follower of Ice Cream & Wine, I ask that you continue with me on this new blog journey! Please update your Google Readers, as well as any links that you may have: http://www.thegranolachronicles.com


Now that this planning is coming to fruition, I'll be back to blogging more often, as well as commenting on your blogs. I know I've been MIA lately, but I truly appreciate all your support and comments. Thank you, thank you!!

January 12, 2011

CSA : J&P Organics

My husband and I belong to the best CSA program - although it's our first CSA that we've joined, so we have no comparison. But it's great! We get our produce each week from J&P Organics. I've received many questions from friends and family asking how we went about choosing this particular farm. To be honest, they have a partnership of sorts with Stanford, so a drop-off location for the CSA boxes is on campus (I believe that's the extent of their "partnership" - just a location). Convenience sometimes makes the decision for you, doesn't it? However, we truly enjoy our produce and fully support J&P Organics.

Some of our produce from J&P Organics
We receive an email from J&P over the weekend telling us what they're offering for the upcoming week. It's a week-by-week basis - no contract like many other farms require. If we want to order a box for that week, we simply pay online and our produce is ready to be picked up on Tuesday. 

We do our grocery shopping at 8:00 AM on Sunday mornings (no crowds!), so knowing what fruits and veggies we'll have for that week makes menu planning and grocery shopping a breeze. I plan meals that incorporate the particular vegetables, and we make sure no vegetable goes to waste! 


I get rather excited when I find a recipe that includes almost all the various types of vegetables that we have for that week - it's so fun to make a meal using mostly food from our CSA box. Things like curry, stir-fry and soups tend to feature a lot of vegetables, so these types of dishes are made at least once a week. 


But at times there are vegetables that aren't so versatile. Sunchokes? Yeah, we had those two weeks in a row back in the fall. Beets? My husband LOVES them, so he was excited. Leeks, also - not a super uncommon vegetable but definitely not a kitchen staple. I see these unique vegetables as a challenge. I'm forced to think outside the box. To search for recipes that I would normally glance over. 


Also, it's saving us A LOT of money. We pay $23 each week, and we receive a TON of produce. If we were to put that $23 toward produce from the grocery store, we would only be able to buy half of what we get from J&P. It's such a great deal.


Alright, so it turns out that I was going to share a recipe with you (Chickpea Bajane), but it seems my excitement for our CSA program took over!

January 9, 2011

Coconut Macaroons


Before I start praising Coconut Macaroons, I must first share some information about my shameful past.

I was, by far, the pickiest eater as a child. Onions? Gross. Mushrooms. Yeah, right. Coconut? Don't even make me.

I can only laugh at how far my taste buds have come. Most of my willingness to try new food stems from my relationship with my husband. That man will try anything! I've also come to the realization that to completely identify myself as "foodie," I must be willing to try new, interesting flavors and ingredients. While coconut is not a new ingredient by any means, the fact that I LOVE Coconut Macaroons is an interesting change of behavior!


These macaroons can hold their own, but I can only imagine what would happen if they were to be dipped in dark chocolate. Swoon.

*Note you can use either sweetened or unsweetened coconut.

Coconut Macaroons
Source: Coconut Macaroons III, All Recipes

Ingredients:
2/3 cup all-purpose flour
5 1/2 cups flaked or shredded coconut (one normal size package - I forget how many ounces!)
1/4 teaspoon salt
1 - 14 oz. can sweetened condensed milk
2 teaspoons vanilla extract


Directions:
Preheat oven to 350 degrees. Line cookie sheets with parchment paper.


In a large bowl, stir together flour, coconut and salt. Stir in the condensed milk and vanilla extract with a spatula. Use a small cookie scoop to shape coconut into mounds. Place on cookie sheet and bake for 12-15 minutes. Coconut should begin to brown and be toasted.


Yield: 24-30 macaroons, depending on your size

January 6, 2011

Zucchini-Lemon Muffins

 I could easily apologize to you right now. It's been a while, hasn't it? I should feel terrible that I haven't been supplying you with yummy recipes. Well, life has been so good this past month that I just haven't had the time - and for that, I do not apologize!

You know I've been searching for a job out here in beautiful California. But what you may not know is that I was offered a position with a non-profit organization at the end of November and started working in December! Between that and a little 2-week vacation to Nebraska for the holidays, my life has been a little crazy. I'm just so blessed.

I digress.


Today I bring to you my first post of 2011. I know it should be some grand recipe...but it's just muffins. But not any old muffins! Zucchini-Lemon! Make these and you'll have spring on your mind, guaranteed. (P.S. I can't say, hear, read or type the word 'muffin' without thinking of this. And I'm not complaining.)

Zucchini-Lemon Muffins
Source: Cooking Light, June 1995


Ingredients:
2 cups all-purpose flour (I used half whole wheat, half all-purpose)
1/2 cup sugar
1 tablespoon baking powder
2 teaspoons grated lemon rind
1/4 teaspoon salt
1/4 teaspoon nutmeg (I used cinnamon)
1 cup coarsely shredded zucchini
3/4 cup skim milk
3 tablespoons oil (I used applesauce)
1 large egg


Directions:
Preheat oven to 400 degrees.

Combine the first 6 ingredients in a bowl; make a well in the center of the mixture. In a separate bowl combine zucchini, milk, oil and egg. Add to flour mixture, stirring just until dry ingredients are moistened.

Divide batter evenly among 12 muffin cups - lined with baking cups or sprayed with cooking spray. Bake for 12 minutes or until golden. Remove from pans immediately and let cool on wire rack.

December 5, 2010

Vegetable & Chickpea Curry


I have recently become obsessed with coconut milk and have been pouring it into just about every meal these past few weeks. No joke.

I absolutely love the combination of coconut milk, curry powder and tomatoes - such a great flavor that is oh-so comforting. You can imagine my excitement when I found this recipe for Vegetable & Chickpea Curry that makes use of a slow cooker...my true love!


This dish does require a fair amount of chopping/dicing as preparation, as well as a bit of sauteing to begin. But the satisfaction you get when you can literally just throw everything in the slow cooker and forget about it, totally makes up for it. Just stir in the coconut milk and spinach right before eating and serve with brown rice - a simple meal that will warm you up during these chilly winter months! 


Vegetable & Chickpea Curry
Source: Cooking Light

Ingredients:
1 T. olive oil
1 1/2 c. chopped onion
1 c. sliced carrots
1 T. curry powder
1 t. brown sugar
1/2 t. ground ginger
2 garlic cloves, minced
1 jalapeno, chopped (omit the seeds if you're not a fan of the spice!)
3 cups chickpeas (garbanzo beans)
1 1/2 c. cubed potatoes
1 c. chopped green pepper
1 c. small broccoli florets
1/2 t. salt
1/4 t. pepper
1 - 14.5 oz can diced tomatoes
1 - 14 oz. can vegetable broth (I used low sodium)
3 c. fresh baby spinach
1 cup coconut milk


Directions:
Heat oil in a large skillet over medium heat. Add onion and carrot; cover and cook 5 minutes or until tender. Add curry powder, sugar, ginger, garlic, and chile; cook 1 minute, stirring constantly.

Place onion mixture in a 5-quart electric slow cooker. Stir in chickpeas and next 8 ingredients (through broth). Cover and cook on HIGH 6 hours or until vegetables are tender. Add spinach and coconut milk; stir until spinach wilts.

November 16, 2010

Pumpkin Blondies (Vegan!)


While I have begun listening to Christmas music, I'm a firm believer that autumn treats should still be consumed in full force until Thanksgiving. There's just something about fall flavors that excite me - pecans, pumpkin, apples, cinnamon - such wonderful aromas and treats for the taste buds!

 
When I stumbled across these (vegan!) Pumpkin Blondies over on Hillary's blog, I knew I had to make them - pronto. Don't let the fact that they are vegan fool you; I think a lot of people may be hesitant to vegan options but don't be! These are absolutely decadent and delicious. I love experimenting with vegan baking, and this concoction did not disappoint! 

 
Pumpkin Blondies
Source: Nutrition Nut on the Run

Ingredients:
3/4 c. canned pumpkin
1/2 c. applesauce
1/2 c. sugar
1/2 c. brown sugar
1/4 c. almond milk (or soy milk)
2 tsp. pure vanilla
1 1/4 c. whole wheat flour
1/2 tsp. baking powder
pinch of salt
dash of nutmeg, ~1/4 tsp.
double dash of cinnamon, ~1 tsp.
1/3 c. pecans, chopped
2/3 c. dark chocolate chips 

Directions:
Preheat oven to 375 degrees.

In a medium bowl, mix together the wet ingredients [pumpkin, applesauce, sugars, soy milk, vanilla]. In a separate, larger bowl, mix together flours, baking powder, salt and spices. Pour wet ingredients into the dry, combine – mixing minimally. Fold in nuts and chips. Then plop into a greased 8×8 pan and bake for 18-20 minutes [timing will vary by the type of pan]. Let cool completely before cutting into squares.

October 29, 2010

Tomato Tortellini Soup


It's been a while since I've posted a soup recipe - but don't think we haven't been enjoying warm, comforting meals. I have a lot of soup recipes lined up to share with you. They are all winners, trust me.


This recipe for Tomato Tortellini Soup caught my eye as I was searching for meals that included bok choy. Y'all, the organic farm that we have our CSA box through must be lovers of bok choy. We seriously get it every.single.week. I kid you not. I made a tofu stir-fry a couple weeks ago that used up some bok choy, but I wanted to branch out from stir-fries. Bok choy is so much more than that! 


The original recipe called for sun-dried tomatoes. Well, being the frugal person that I am, I just used canned, diced tomatoes. It was perfect. That's the great thing about cooking in your own kitchen - you can swap out ingredients to your liking (or what you have on-hand!).


Tomato Tortellini Soup
Adapted from: Sun-Dried Tomato Tortellini Soup, Cooking Light

Ingredients:
1 1/2 teaspoons olive oil
1 cup chopped onion
1 cup (1/4-inch-thick) sliced carrot
2/3 cup sliced celery
2 garlic cloves, minced
5 cups fat-free, less-sodium chicken broth
2 cups water
1 14.5 oz. can diced tomatoes, drained
1/2 teaspoon dried basil
1/4 teaspoon freshly ground black pepper
1 bay leaf
3 cups fresh cheese tortellini (about 12 ounces)
1 cup chopped bok choy

Directions:
Heat oil in a large Dutch oven over medium-high heat. Add onion, carrot, celery, and garlic; sauté 5 minutes. Add broth and next 5 ingredients (through bay leaf); bring to a boil. Reduce heat; simmer 2 minutes. Add pasta and bok choy; simmer 7 minutes or until pasta is done. Discard bay leaf.

Yield: 6 servings (serving size: 1 1/2 cups)


October 27, 2010

Herb-Roasted Onions


I am a firm believer that you can toss any vegetable into the oven, and it will be amazing.

Broccoli? Yes!
Cauliflower? Yes!
Brussels Sprouts? Yes!
Onions? You better believe it!

I know I've talked about my love for CSA programs on Twitter - have I mentioned it on here? Well, my husband and I recently joined a CSA program, and we are up to our eyeballs in vegetables. And I am loving every second of it.

Last week, we had an abundance of onions. I already had two soup recipes picked out that included the addition of onion, so I was looking for a completely different way to eat them.

Enter Ina Garten's Herb-Roasted Onions. I cannot put into words how savory the mustard and garlic tastes after heating up in the oven. It's not an overwhelming sauce for the onions - just a nice little coating for a pop of flavor. 


Along with the onions, I also roasted some cauliflower and carrots. For those, I just coated them with olive oil and sprinkled with salt and pepper - bake at 400 degrees for 20 minutes.

Herb-Roasted Onions
Source: Ina Garten

Ingredients:
3 onions (red or yellow)
2 tablespoons freshly squeezed lemon juice
1 teaspoon dijon mustard
1 teaspoon minced garlic
1/2 tablespoon minced thyme leaves - you can also use dried thyme
3/4 teaspoon salt
1/4 teaspoon ground pepper
1/4 cup olive oil
1/2 tablespoon minced fresh parsley leaves - again, you can use dried parsley

Directions:
Preheat the oven to 400 degrees.


Remove the stem end of each onion and carefully slice off the brown part of the root end, leaving the root intact. Peel the onion. Stand each onion root end up on a cutting board and cut the onion in wedges through the root. Place the wedges in a bowl.


For the dressing, combine the lemon juice, mustard, garlic, thyme, salt, and pepper in a large bowl. Slowly whisk in the olive oil. Pour the dressing over the onions and toss well.


With a slotted spoon, transfer the onions to a sheet pan, reserving the vinaigrette that remains in the bowl. Bake the onions for 30 to 45 minutes, until tender and browned. Toss the onions once during cooking. Remove from the oven, and drizzle with the reserved dressing. Sprinkle with parsley, season to taste and serve warm or at room temperature. 

Yield: 3-4 servings

October 20, 2010

Pecan Sandies

 
I had been wanting to make cookies that felt like autumn. While I'm loving pumpkin right now, I wanted to steer clear of that route. When I came across this recipe for Pecan Sandies on Brown Eyed Baker, I knew this was my winner.


Please know that I truly love chocolate. But the simplicity of this cookie can't be beat. With the only add-in being pecans, you get to focus on that particular flavor. The brown sugar gives this a deep, rich flavor - which pairs quite well with a warm mug of coffee. Seriously, heaven.


I don't know how many times my husband proclaimed that these were his "favorite cookies...ever." It brought a smile to my face. Needless to say, the cookie itself brought an even bigger smile to my face. Try this. NOW!

Pecan Sandies

Ingredients:
1/2 cup unsalted butter, room temperature
1/2 cup light brown sugar
1 1/2 teaspoons vanilla
1/4 teaspoon salt
1 cup all-purpose flour - I used whole wheat
1 cup pecans, chopped

Directions:
Preheat oven to 350 degrees.

In the bowl of an electric mixer, beat the butter and sugar on medium speed until light and fluffy. Beat in the vanilla extract and salt until combined. Reduce the mixer speed to low and gradually add the flour, beating just until combined. Fold in the pecans.

Roll the dough into 1½-inch balls (or use a medium-size cookie scoop) and place on baking sheet 2 inches apart. With wax paper or parchment paper, flatten each cookie slightly by placing paper on the cookie and pushing with your hand. The paper will prevent your hands from sticking to the cookie!

Bake for 15-17 minutes, or until golden brown. Do NOT over-bake. They will harden as they cool - so stick to the lower amount of time. Transfer to a wire rack and cool.

Yield: About 1 dozen

October 15, 2010

How to: Cut Honeydew


So I realize that we're heading into fall in full-force right now, but I have a step-by-step tutorial that I really want to share with you.

I love melons. I think that you get a lot of bang for your buck when you buy them. There was a watermelon that I bought this past summer, and while my husband and I ate it every day, it still lasted us for 10 days. I followed Iowa Girl Eats' suggestion on how to cut a watermelon, and it was extremely helpful.


Today I thought I'd share with you how to cut honeydew...by far my favorite melon!

Start by slicing it in half and scooping out the seeds.


Then slice into wedges and cut off the skin.


Finally cut into your desired size of pieces. One inch cubes are my favorite.


Pretty simple, huh?
Enjoy!

October 14, 2010

Slow Cooker Recipes

A very, very dear friend of mine is getting married next week. I'll be flying back to Nebraska to be a bridesmaid in her wedding, and I am very excited to help her celebrate her special day!

I have raved about how much I love my slow cooker on this blog numerous times, so you know how excited I was to hear that she received one at a bridal shower a few weeks ago. She is going to love the simplicity of using a slow cooker, and the great meals she'll be able to make. 


In honor of her latest kitchen appliance, I thought I'd do a little recipe round-up of all the slow cooker meals I've shared on Ice Cream & Wine. These meals are healthy and prove that you don't have to sacrifice flavor and nutrition when using your slow cooker!

*Please remember that most of these photos were taken with a super old camera and in the middle of winter in a gray, gloomy Baltimore. I'm thinking about making all these again (and soon!), so I can update the photos!


Eggplant Curry
Chicken Cacciatore
Honey Glazed Chicken
Pineapple Chicken
Salsa Chicken
Spicy BBQ Chicken
Turkey Supper Potluck


I hope you'll be able to enjoy these great recipes now that fall is here!

October 12, 2010

Sausage Cabbage & Apple Soup


I adore soup. And in all honesty, I could eat soup for every meal. It's so warm and comforting, and it really makes my heart happy.

Last year my mother gave me a Taste of Home Heartwarming Soups magazine - boasting over 350 recipes. No matter how many times I've read it, I keep going back for more. Looking at soup recipes just never gets old.

This recipe immediately caught my attention because of the addition of apples. Apples in soup? It won me over. This is a perfect treat for these fall months, and a very simple recipe to follow. I made a few changes - which I'll note below. You must try it!

Sausage Cabbage & Apple Soup
Adapted from: Taste of Home Heartwarming Soups (submitted by M. Wolff, Indiana)

Ingredients:
3 cups coleslaw mix - I just used plain cabbage
2 medium carrots, chopped
1/2 cup chopped onion
1/2 cup chopped celery
1/2 teaspoon caraway seeds - I omitted this, not a fan!
2 tablespoons butter
1 carton (32 oz.) chicken broth - I used low sodium
12 oz. fully cooked chicken sausage, cut into 1/2-inch pieces
2 medium unpeeled Granny Smith apples, chopped
1/4 teaspoon pepper
1/8 teaspoon salt 

Directions: 
In a stockpot, saute cabbage, carrots, onion, celery (and caraway seeds, if using) in butter for 5-8 minutes or until vegetables are crisp-tender. Stir in remaining ingredients.

Bring to a boil. Reduce heat; simmer, uncovered for 20-30 minutes, stirring occasionally.

Yield: 6 servings

October 8, 2010

Nut Butter Carrot Fries

I used to always buy the bags of baby carrots. Until I realized one day that it is much cheaper to buy regular carrots. You know, the carrots that look like they were literally just pulled from the ground. You know, the kind that you would imagine rabbits eating. Yes, those.

So we've been buying those carrots recently, and I find peeling them rather fun. I know, I have an odd obsession/liking toward kitchen gadgets. 

The problem: we're up to our eyeballs in carrots. We can only eat so many atop salads and dipped in hummus.


So when I heard that you could slice carrots, lather them in nut butter and bake in the oven to turn into fries, I was rather intrigued. 

My curiosity always gets the best of me when it comes to food, so I had to try these out. And now, I'm rather addicted!

Nut Butter Carrot Fries
Source: Oh She Glows and Meals & Miles


Ingredients:
3 medium carrots - sliced into thin strips
2 tablespoons nut butter (I just used all-natural peanut butter)
1 tablespoon oil
1/2 teaspoon salt


Directions:
Preheat oven to 400 degrees and line a baking sheet with foil.

In a medium bowl, whisk together the nut butter, oil and salt. Add sliced carrots and toss to coat. 


Place in a single layer on the baking sheet. Bake for 30 minutes - you can flip them halfway through to prevent burning.

October 6, 2010

Pumpkin Spice Latte


Now I know I can't speak for everyone, but it seems that most people enjoy the changing of seasons from summer to fall. I know I do!

Fall can tease us - bringing cooler weather one week, only to be followed by hot 90 degree weather the next. So when the true fall season sets in, I rejoice! But how does one know?

I look to Starbucks to give me this information. When a Pumpkin Spice Latte lands on their menu, I declare it fall! But this little, addictive drink can be rather expensive. At least to me and my husband. Oh, I didn't tell you one of us is in graduate school at a top institution and the other is unemployed?! Such a perfect match, we are!


But I digress. When I found this recipe for a homemade pumpkin spice latte, well, I knew immediately that I wanted to make it. I bypassed the step that said to mix well in a blender, as I really didn't feel like dirtying the blender and then having to wash it. Yes, I am lazy. Yes, we don't have a dishwasher.

So I actually ended up with a pumpkin spice cafe au lait. Which was still incredibly delicious. If you want the frothy texture, be sure to blend this bad boy up. To get this recipe, please check out the link below!

Pumpkin Spice Latte
Source: Peas and Thank You - please check out this blog - amazing!

October 5, 2010

Boudin: San Francisco

One reason (among many) I was so looking forward to moving to California was the food. California is known for hip and trendy restaurants, great farmers' markets, fresh seafood, and...good wine. Wait, what? Y'all, don't even try and tell me that wine isn't a food group, ok?!


Anyway, my husband and I moved to, what we believe to be, the best part of California: the San Francisco Bay Area. It is perfection, really. And we're enjoying every minute of it. 


We made it up to the city (SF) last weekend with friends. It was decided that Boudin would be our destination for dinner that evening at Fisherman's Wharf. I had heard great things about Boudin's sourdough bread bowls from my husband, who was able to enjoy them on a trip out to the area last year.

I had also heard great things about their clam chowder. Um, excuse me?


Sure, I've posted fish recipes on here. Sure, I'll try various types of fish. Lobster, crab, clams? Er...

I so desperately wanted to order the tomato soup as I nervously stood in line at Boudin. But peer pressure sunk in, folks. Fine - I'll try the clam chowder!  


Dare I say I enjoyed it? No - I don't think I'll publicly admit that. That's a rather big commitment.


So I'll say this: it was actually pretty good. Of course, when I chomped down on an actual piece of clam, it was a little seafood-y. But, I ate it. A lot of it.


And the bread bowl? Oh, friends, the bread bowl! Carbs are truly a wonderful thing, and the bread bowl did not disappoint!


Boudin has several locations in San Francisco. If you're ever visiting the city, definitely check it out!

October 4, 2010

Menu: October 4-8

Hey, all - I hope you had a great weekend! Mine was great...minus the fact that we dealt with a sad Stanford football loss on Saturday. Who would have thought I'd be so upset over a game that didn't involve my beloved Nebraska Cornhuskers?! Pure craziness. However, we went to the local farmers market for this first time, and it was glorious. Definitely a good weekend!


Here's the menu for the week. I haven't finalized our vegetable side dishes yet and for good reason. 

WE JOINED A CSA PROGRAM! We'll find out tonight what produce we'll get, and then we'll be picking up the box tomorrow - I am so darn excited!

Monday: Chicken Sausage Cabbage Soup
Tuesday: Soup Leftovers
Wednesday: Bean Tacos
Thursday: Vegetable Pasta
Friday: Pasta Leftovers/Pizza

October 1, 2010

Lemon Mahi Mahi

I love me some good mahi mahi.

And here's a fun fact about mahi: my husband actually caught a mahi back in May! We were on a sailing trip down in The Bahamas with some of our friends, and Evan caught my favorite fish. I mean, life is just great. 


Reel it in.


Here's the beauty!


So now whenever we enjoy the gloriousness that is mahi mahi, I always think back on our sailing trip. Don't you just love how food can do that? 


Here's a super easy way to cook mahi - just lemon, thyme and olive oil. Enjoy!

Lemon Mahi Mahi
Adapted from: Running Mama Cooks 

Ingredients:
2 mahi mahi fillets
2 lemons (one sliced, one for the juice and zest)
1 tablespoon lemon zest
1 teaspoon olive oil
1 teaspoon dried thyme
salt
pepper

Directions:
Preheat oven to 450 degrees.

Place the slices from one lemon in a baking dish, covering the bottom. Season fillets with salt and pepper, then place on top of sliced lemons.

Drizzle with the juice of one lemon, zest and olive oil. Sprinkle with thyme. Cover with lid or foil and bake for 16-20 minutes - until fish flakes easily with a fork.

September 30, 2010

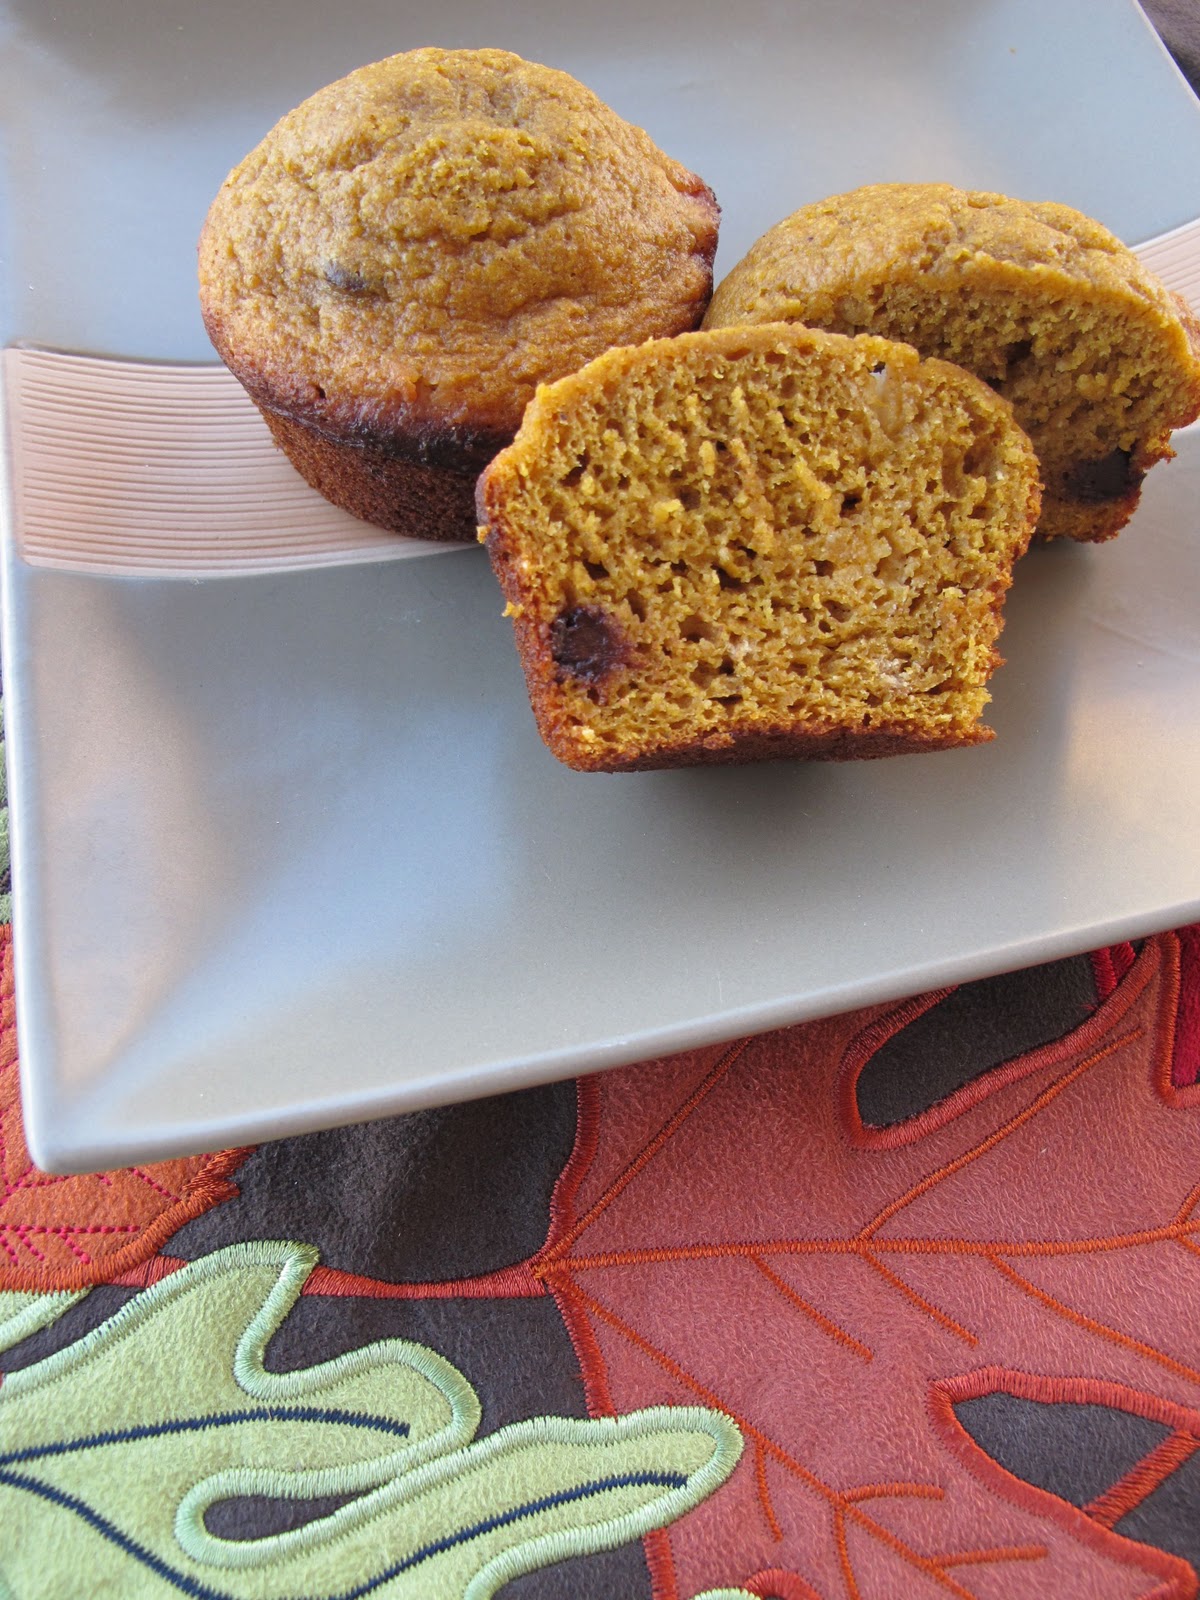
Pumpkin Chocolate Chip Muffins

Y'all, I absolutely am in love with autumn. By far, it is my favorite season. I grew up in Nebraska, and there were wonderful orchards that I frequented every year with my family. I remember how excited my grandma would be about having her granddaughters with her - showing us off to her neighbors (hello, rural Nebraska!), buying my sister and me endless amounts of rock candy, honey sticks and warm apple pie. 


I miss my grandma terribly during these fall months. But instead of becoming sad, I use this time to celebrate all things fall-related in full force. It brings back all the happy memories I have of her. I decorate our apartment (just got some great new place mats!), eat apples like it's my job, bake with pumpkin and enjoy cider whenever possible.
Pretty new place mat!
I found this pumpkin muffin recipe online and made a few adjustments. The major one being the addition of chocolate. Because let's be honest: if my grandma were to make these muffins, she would have added chocolate. Why?


My grandpa loves chocolate. And love makes you do silly things sometimes.


Grandma Rogers' Pumpkin Muffins
Adapted from: Pumpkin Wheat Honey Muffins


Ingredients:
1 1/2 cups whole wheat flour
1/2 cup packed brown sugar
1 teaspoon pumpkin pie spice (or a combo of cinnamon, nutmeg and ginger)
3/4 teaspoon baking powder
1/2 teaspoon baking soda
1/2 teaspoon salt
2 eggs
1 cup canned pumpkin
1/2 cup applesauce
1/2 cup honey
1/2 cup chocolate chips (I used regular and white)


Directions:
Preheat oven to 350 degrees. Grease a 12 cup muffin pan, or line with paper cups. 


In a large bowl, stir together flour, sugar, pumpkin pie spice, baking powder, baking soda and salt. Make a well in the center, then ad the eggs, pumpkin, applesauce and honey into the center. 


Mix just until the dry ingredients are absorbed. Stir in chocolate chips. Scoop batter into muffin cups so they are 2/3 full. 


Bake for 18-20 minutes (until the tops of the muffins spring back when lightly pushed). Cool in pan before removing.

September 29, 2010

Wine Wednesday: Good News

I'm making this post a quick one (mainly because I don't have any photos to share!). Although we're mostly settled into our new apartment here California (that's so fun to say!), I haven't uploaded pictures from my camera yet. P.S. Did I tell y'all that I got a new camera? It's super fun. More details to come on that.

For now, I have some rather exciting news to share. Remember when I wrote about Charles Shaw wine from Trader Joe's? Well, in Maryland it sold for $3.29 - even though its nickname is two-buck-chuck. I thought it was that price in every state.

Friends, there is a reason why I moved to California. And that is because Charles Shaw sells for $1.99 at the TJ's out here. 

Ok, so maybe that wasn't the real reason. Maybe it's because my husband is amazing and is attending graduate school out here. 

But what a fabulous perk! You can't even imagine how excited I was to find this out! :)

Happy Wine Wednesday, friends. You know I'll be celebrating with a little Shiraz tonight!